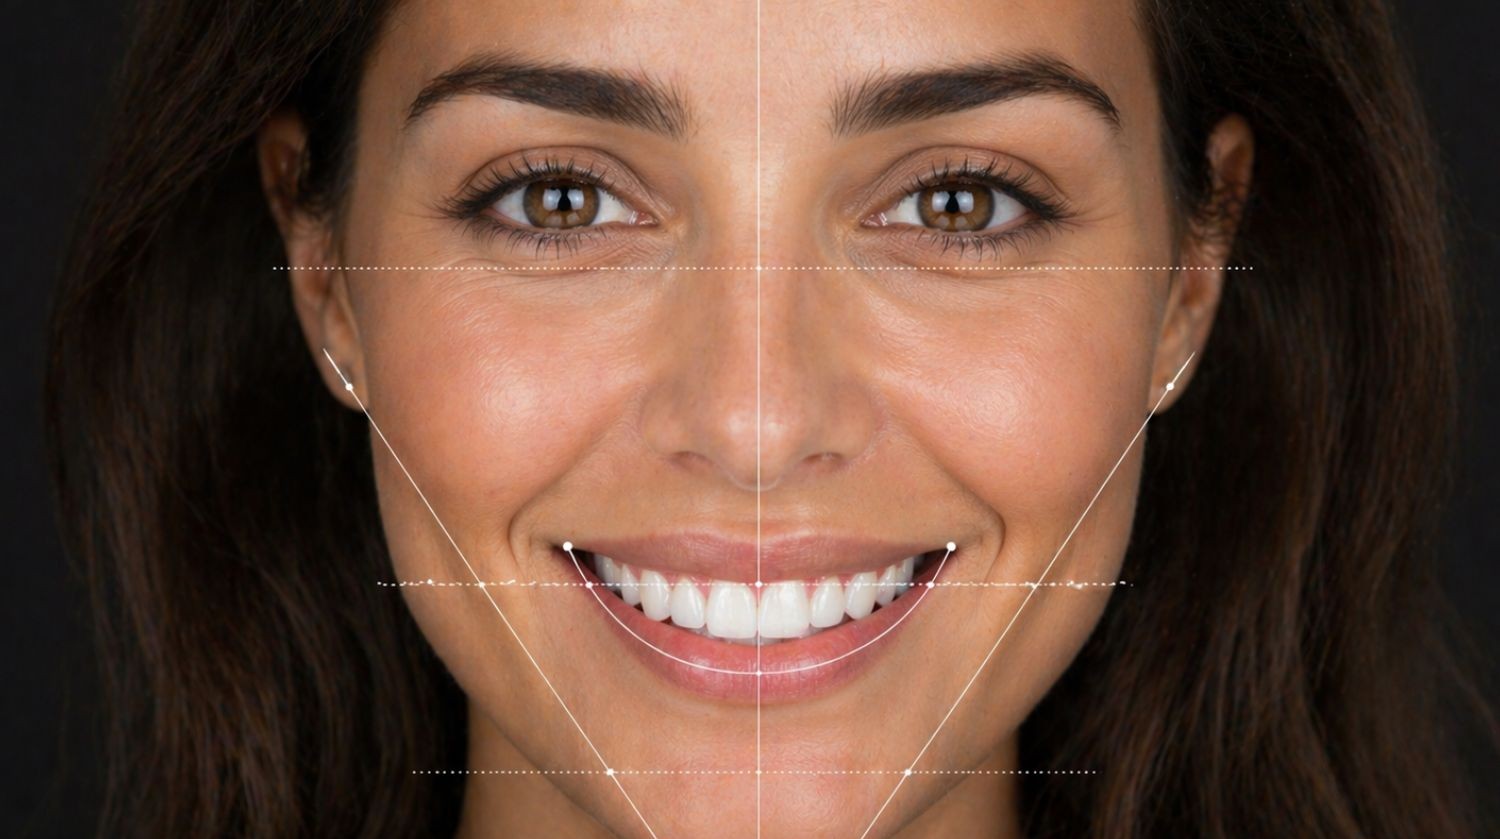
One of the questions we hear most often when a patient begins an aesthetic dental treatment is:
“How do I know what I am going to look like before anything is done?”
Years ago, many aesthetic decisions depended largely on photographs, models, the dentist’s explanations and the patient’s ability to imagine the result.
Today, we can work in a completely different way.
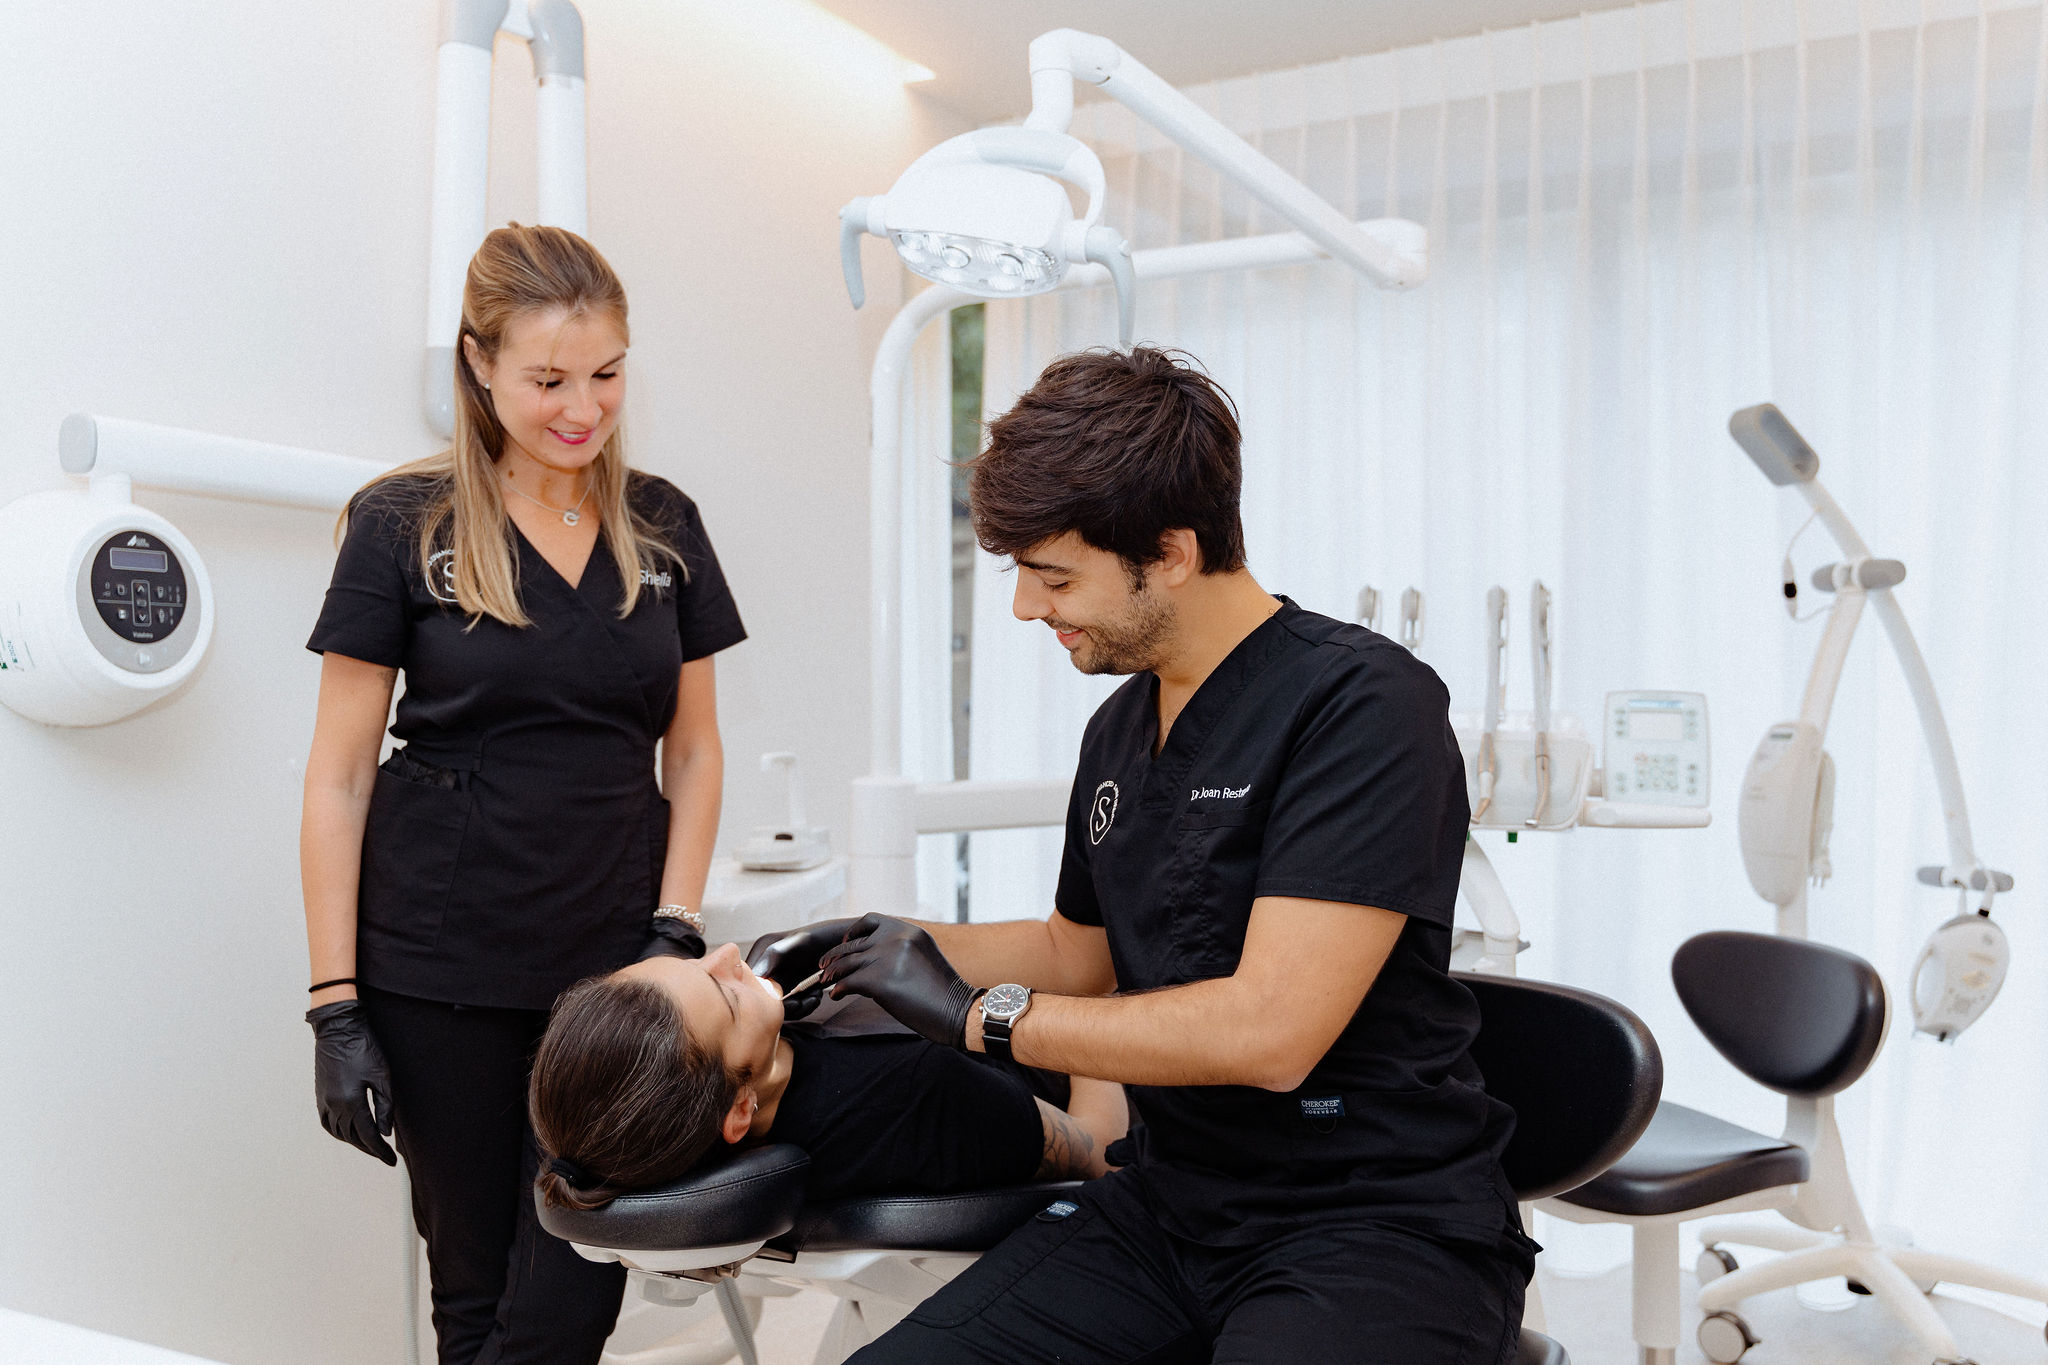
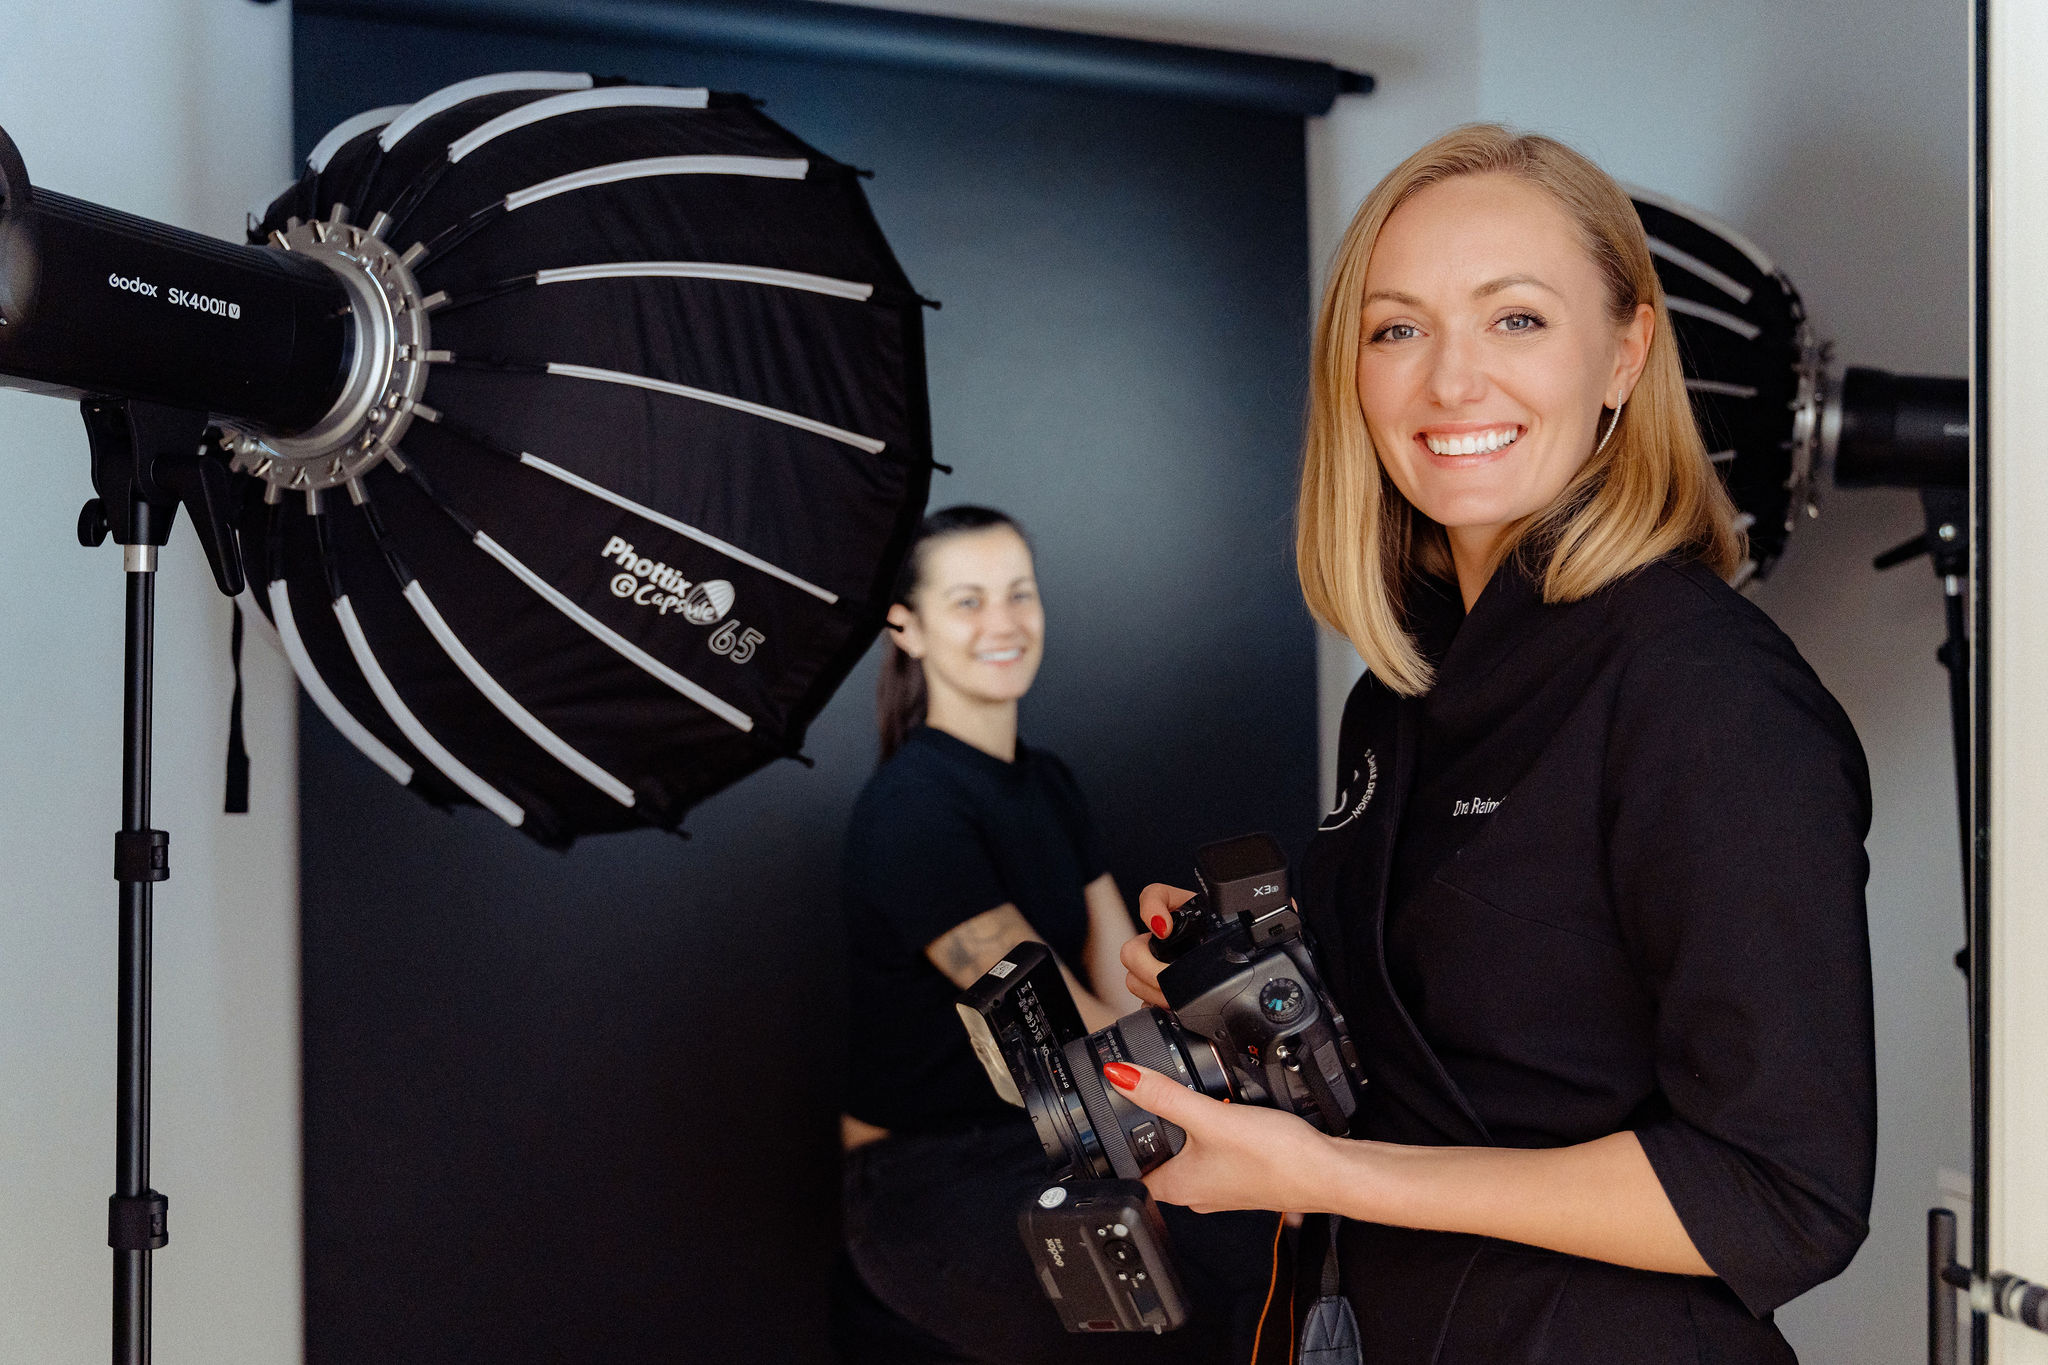
At SMITA, we use different tools including Digital Smile Design, photography, 3D scanning, digital planning and mock-ups that allow us to visualise, measure and test a treatment before moving on to a definitive stage.
And it is important to understand that there is not just one type of “simulation”.
We can work at three different levels:
Digital simulation on a photograph
Three-dimensional design based on a 3D scan
Physical simulation with a mock-up directly in the mouth
And when the design shows us that, in order to achieve the smile we want, we first need to change the position of the teeth, digital orthodontics with Invisalign and ClinCheck comes into the process.
For us, this process is not simply about showing the patient a beautiful image.
It serves a much more important purpose:
to plan better so that we can intervene less.
Digital Smile Design: first we understand the smile within the face
Everything starts with the design.
The concept of Digital Smile Design — DSD — is based on one fundamental idea: we should not design teeth in isolation.
Teeth are part of a smile.
The smile is part of the lips.
And the lips are part of the face.
That is why, before deciding whether a patient needs composite, porcelain, orthodontics, gum treatment or simply whitening, we study how all these elements relate to one another.
We analyse:
The face
The lips
The smile line
Tooth display
Tooth proportions
The position of the midline
The gums
Symmetries and asymmetries
The relationship between the incisal edges and the lips
Tooth position
Function and bite
The idea is not to create “ideal teeth” independently.
It is to find the shapes, proportions and positions that work best within each patient’s individual anatomy.
Digital design also becomes a common language between the aesthetic dentist, orthodontist, periodontist, dental technician and, above all, the patient.
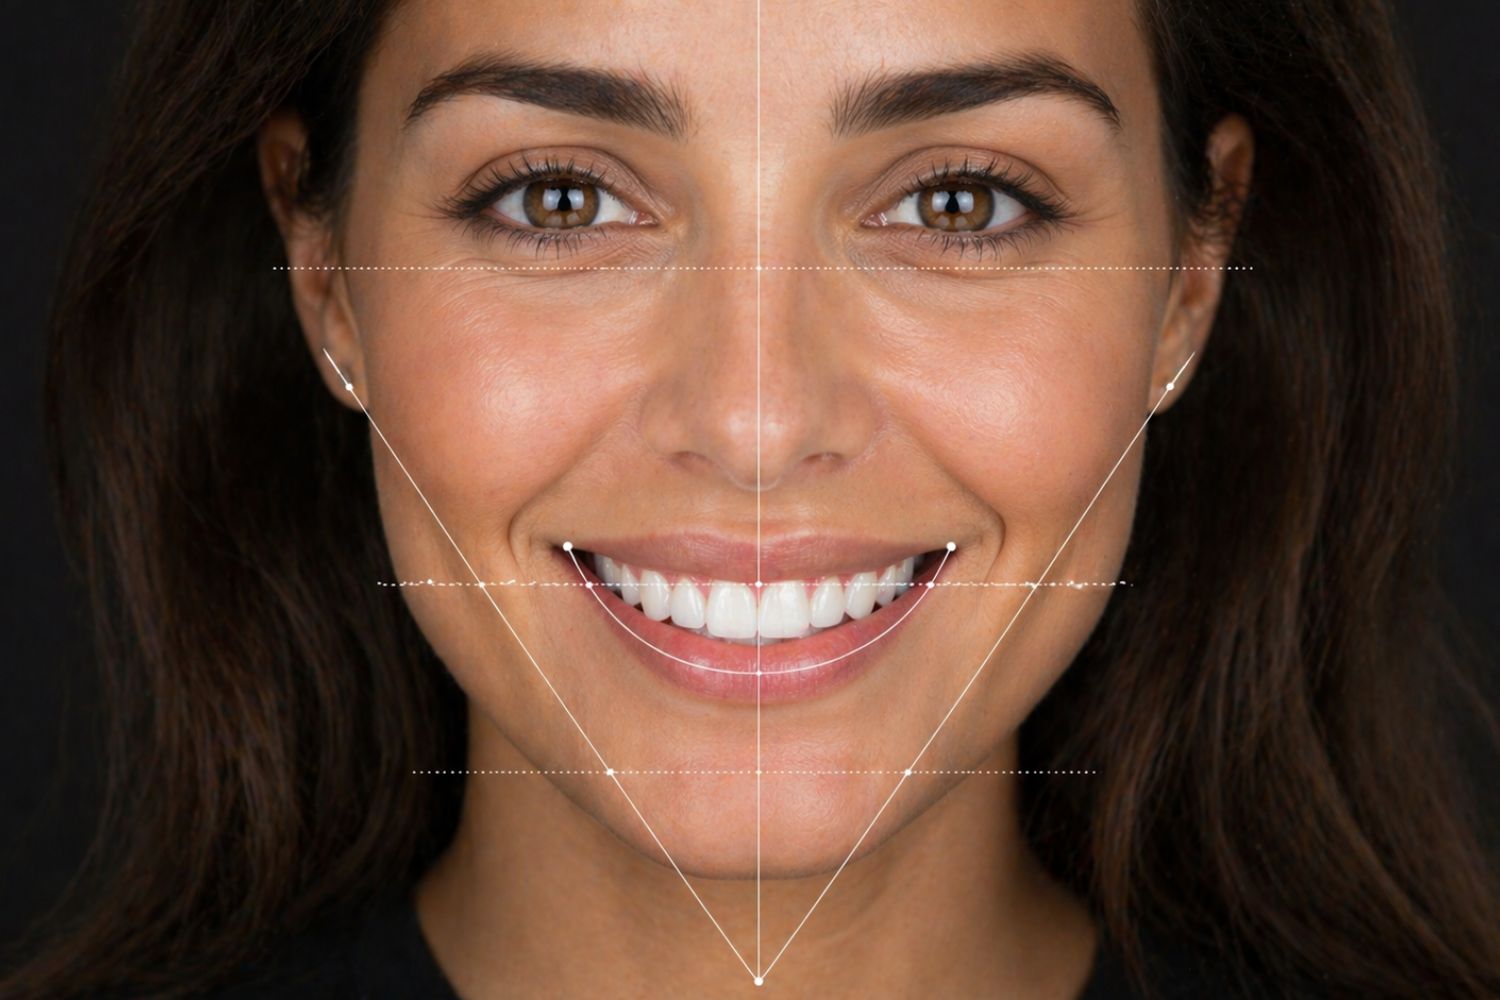
1. Digital simulation on a photograph: seeing a first possibility
The first level of simulation can be created from photographs.
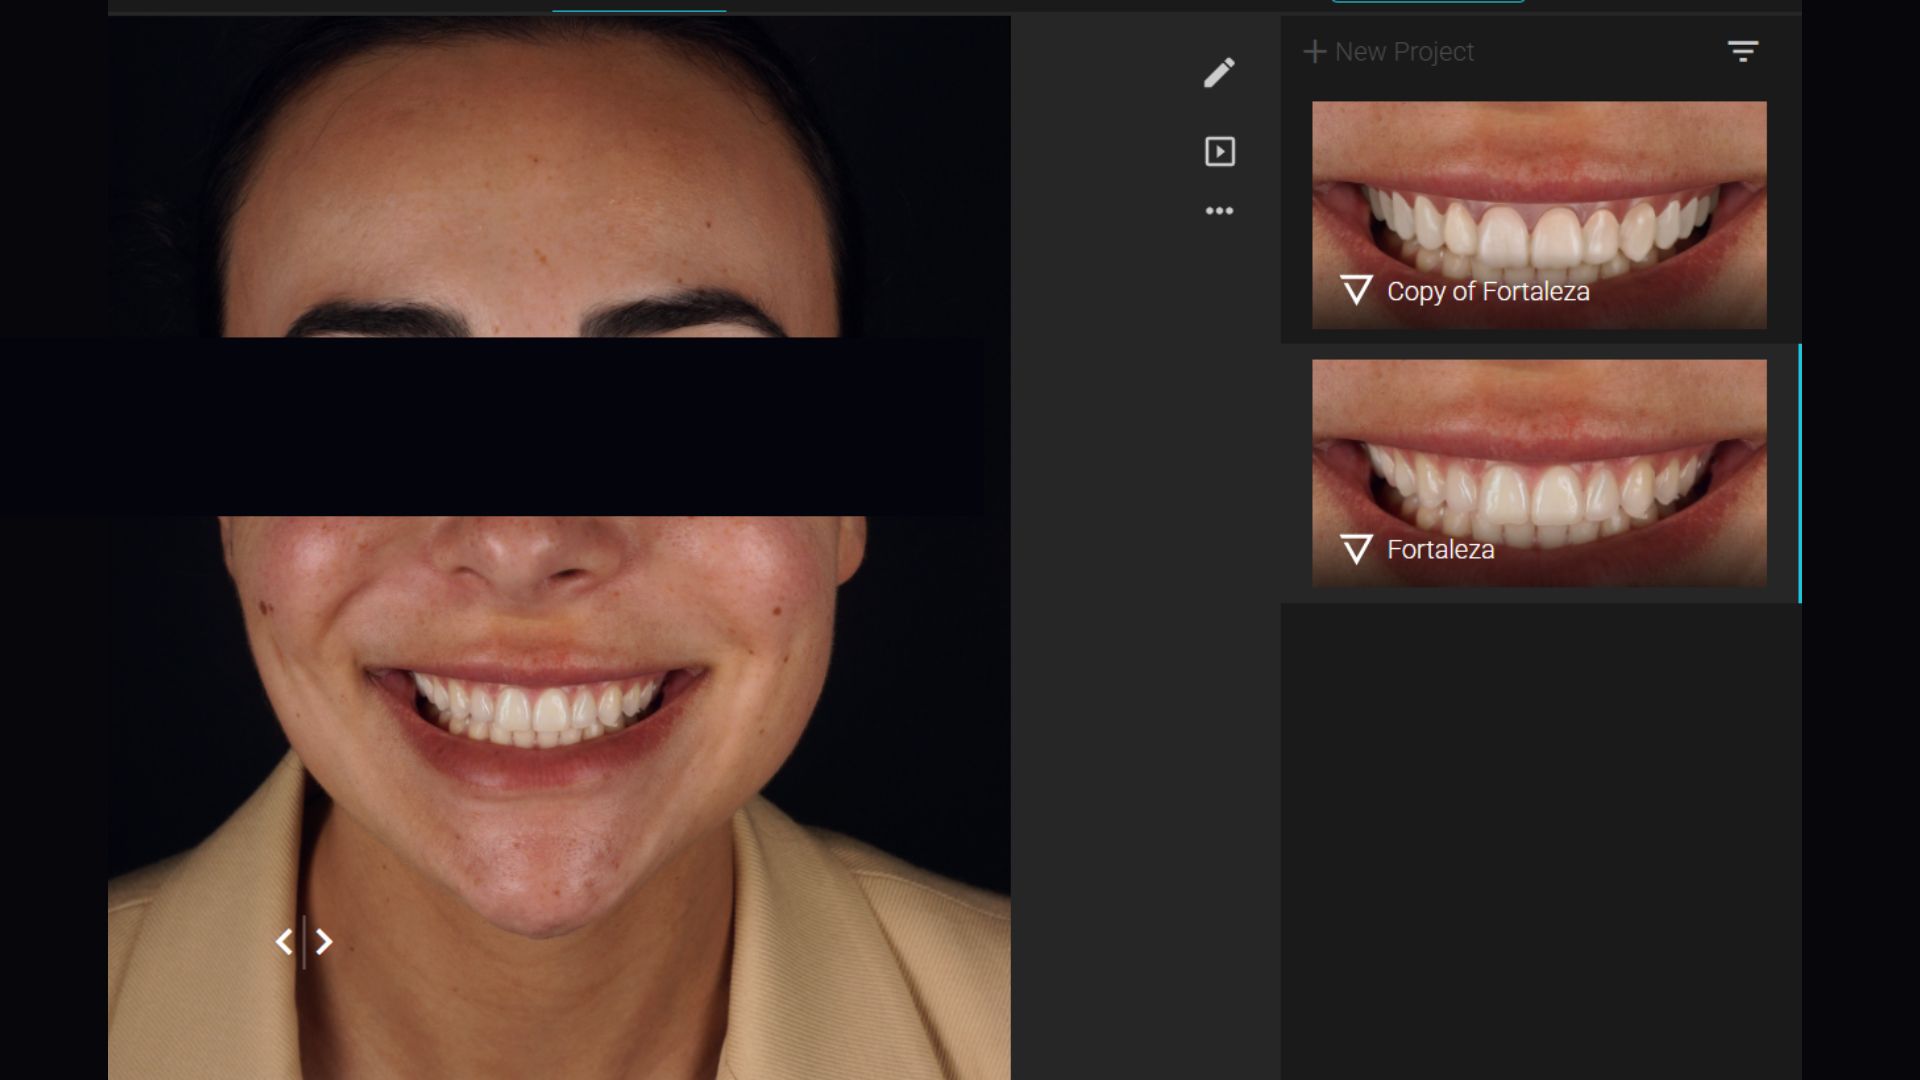
Tools such as SmileCloud allow us to use facial references to generate and then adjust smile designs, modifying elements such as proportions, position, smile curve and dental characteristics. SmileCloud can even start from a facial photograph and allows us to refine the design afterwards.
We can also work with tools such as 3Shape Smile Design, which allow us to create a possible smile design over the patient’s photograph and use that image as a planning and communication tool.
In this first simulation, we can visually assess:
Tooth length
Width
Proportions
Shape
Smile curve
Midline
Gingival display
Relationship between teeth and lips
Possible visual compensation of minor asymmetries
Approximate colour
This stage is especially useful because within a few minutes the patient can understand the direction in which the treatment could go.
But we need to make something very clear:
a simulation on a photograph is a visual representation, not an exact reproduction of the real volume of the teeth.
It is the first level of planning, not the last.
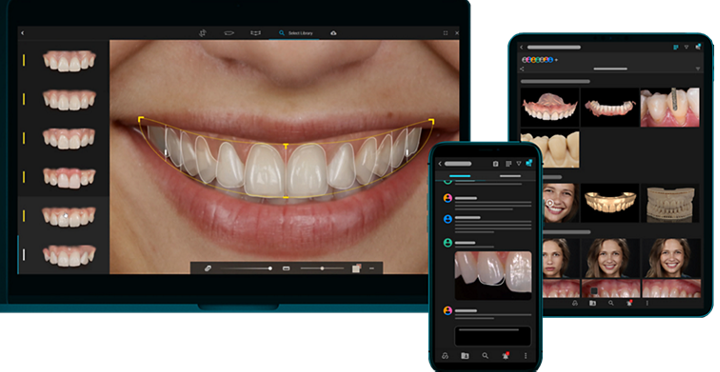
SmileCloud: from an image to an idea the patient can understand
We particularly like the fact that digital design allows us to transform concepts that may sound very technical into something that the patient can easily understand.
With SmileCloud, we can create proposals, modify the design, adjust proportions, smile curve and tooth position, and then present a much more visual simulation.
The platform can also generate photographic representations and even video simulations of the before and possible after.
This has enormous value during a consultation.
Talking for twenty minutes about “incisal length”, “tooth proportions” or the “buccal corridor” can be difficult to imagine.
Seeing it changes the conversation completely.
The patient can say:
“I like this.”
“They look too long.”
“I want something even more natural.”
“I like this shape, but I do not want such a big change.”
That is where truly personalised smile design begins.
2. 3D design: moving from a visual idea to real planning
The second stage is different.
Here, we are no longer working only from a photograph.
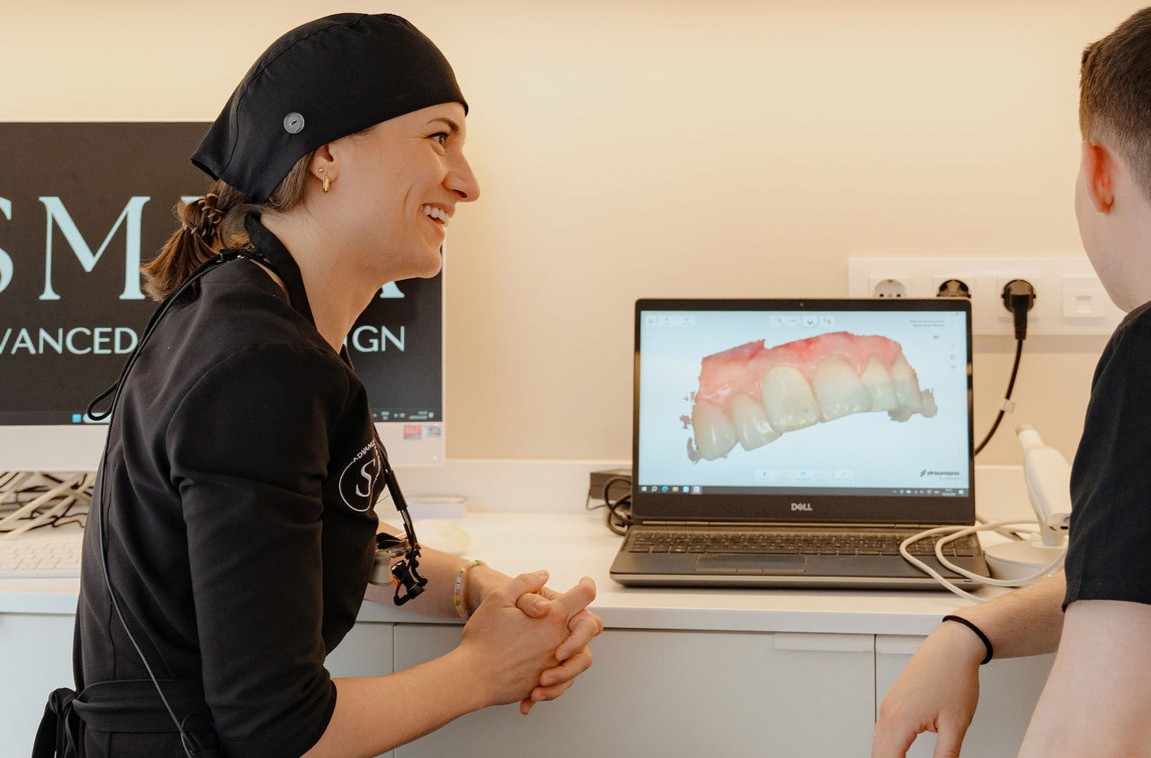
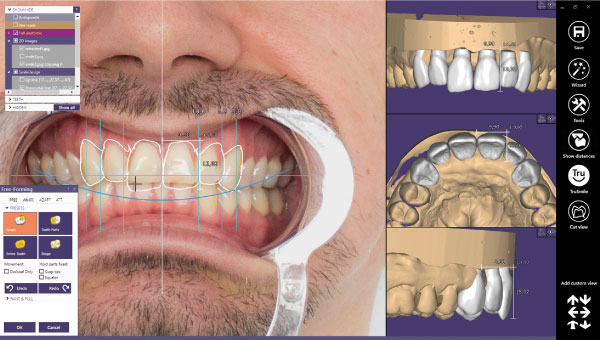
We perform a 3D intraoral scan, obtaining a digital reproduction of the teeth and tissues that we can study from multiple angles.
3Shape describes digital scanning as a three-dimensional model that can be used as a starting point for planning, patient communication and collaboration with the laboratory.
From this scan, we can start working with real dimensions.
We can measure:
How much we want to lengthen a tooth
How much space is available
How much volume we can add
Where the contacts are
How the teeth relate to one another
Which changes could be purely additive
Where excessive volume could occur
Which parts of the aesthetic proposal are genuinely feasible
This is where simulation stops being simply a beautiful image and starts becoming clinical engineering of the treatment.
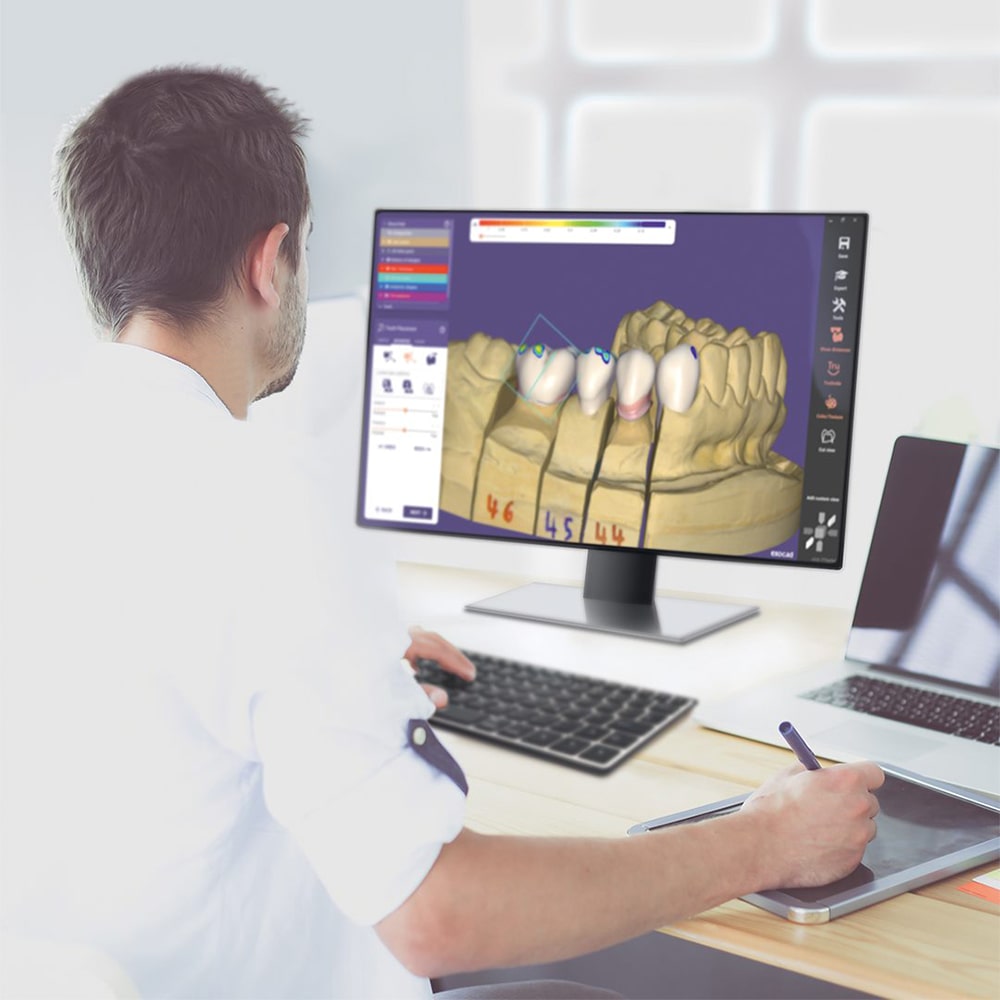
3Shape and exocad: designing the new anatomy in three dimensions
With CAD tools, we can digitally build new dental shapes.
exocad Smile Creator, for example, allows us to combine 2D photographs with 3D scan data and visualise the three-dimensional design from different angles in real time.
That design can later become the basis for diagnostic wax-ups, provisional restorations or definitive restorations.
This is important because there is a major difference between saying:
“I think slightly longer teeth would look good.”
and saying:
“We have designed exactly how much the teeth can be lengthened, how much volume we need and how this new anatomy will relate to the rest of the mouth.”
With 3D design, we can review and adjust before touching the teeth.
We can test different proposals.
We can measure.
We can go back.
We can compare.
And we can share all that information between the clinic and the laboratory without relying only on a verbal description.
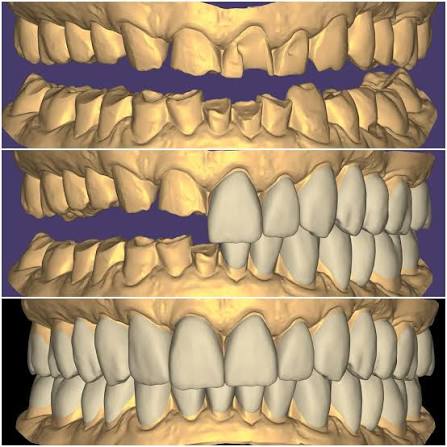
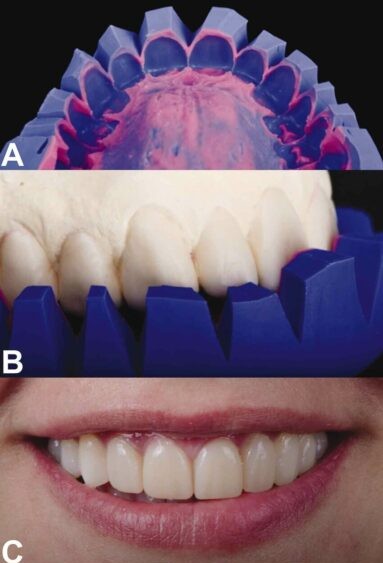
3. Mock-up: bringing the design directly into the mouth
Then comes one of the most interesting parts for the patient.
The mock-up.
Until this point, we have been looking at the design on a screen.
With a mock-up, we can physically transfer it into the mouth.
From the 3D design, we can create a guide or model that allows us to temporarily reproduce the new shape of the teeth.
At this point, the patient no longer has to imagine.
They can:
Look in the mirror
Smile
Speak
Move their lips
Look at themselves from different angles
Take photographs and videos
Assess the length of the teeth
Evaluate the volume
See how the smile changes within the whole face
This is a fundamental difference compared with a photographic simulation.
The photograph shows a possibility.
The 3D design allows us to plan it.
The mock-up allows the patient to experience it directly in the mouth.
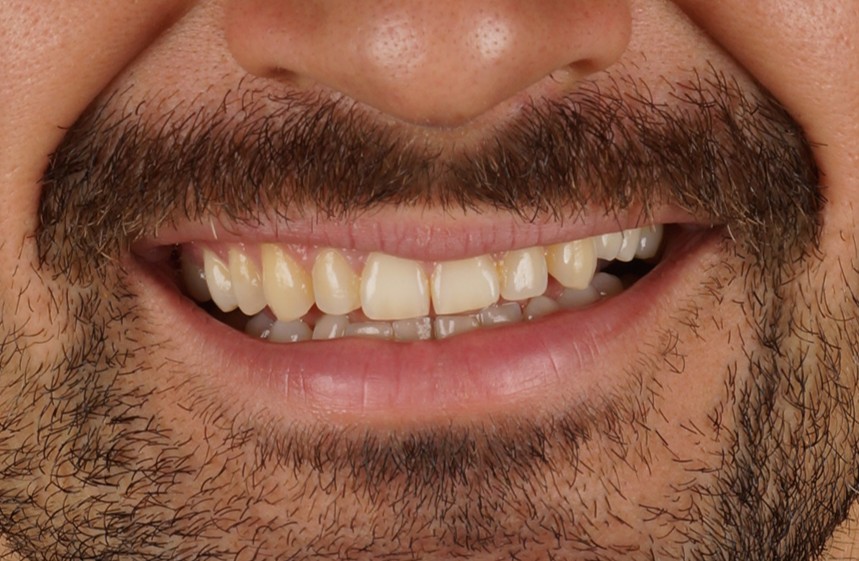
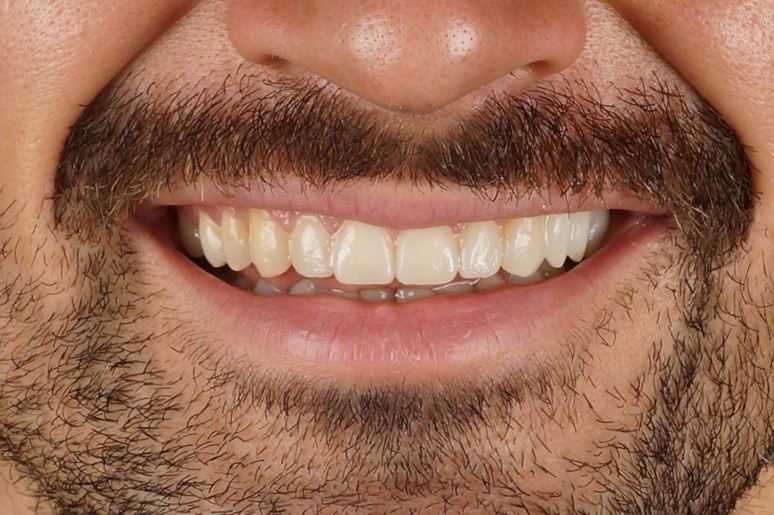
What if I do not like the mock-up?
We change it.
For us, that is precisely one of its greatest advantages.
A design does not have to be accepted the first time.
We may decide that the incisors should be slightly shorter.
Longer.
More rounded.
Straighter.
More dominant.
Softer.
We can modify the volume.
Change proportions.
Correct small details.
And try again.
In certain cases, we can carry out more than one trial before moving on to the definitive treatment.
The aim is not for the patient to simply accept our design.
The aim is to build the design together.
The definitive treatment should come only after we have a very clear understanding of what we want to achieve.
DSD and Invisalign: when the design tells us that the teeth need to move first
This is where one of the most important connections in our workflow appears.
Very often, we begin by designing the smile we want to achieve.
And then we discover something:
to achieve it conservatively, some teeth should be in a different position.
Perhaps one incisor is positioned too far forwards.
Another is rotated.
The midline needs to move.
There is not enough space to add composite.
A tooth is positioned too far buccally to place a veneer without significantly reducing it.
In these situations, the aesthetic design leads us directly to orthodontics.
This is one of the major principles of DSD:
first we define the final result, and then we plan how to move the teeth into the position required to achieve it.
There is even a conceptual and technological integration between DSD and Invisalign in certain ortho-restorative workflows, where the smile design can be used as a reference when planning orthodontic movements.
For SMITA, this makes a great deal of sense.
If we can move a healthy tooth into the correct position, we can often avoid having to shave it later.
Invisalign and ClinCheck: visualising tooth movement before treatment begins
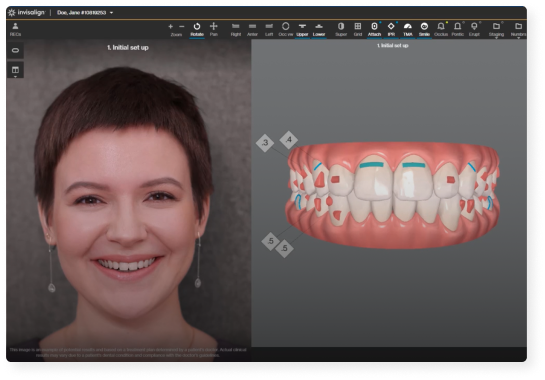
When we decide that orthodontics is necessary, Invisalign adds another level of digital planning.
With ClinCheck Pro, we can work on a three-dimensional representation of the dentition and review the planned sequence of tooth movements.
The orthodontist can modify tooth positions, arch shape, attachments, spaces, IPR when indicated and other elements of the plan, and visualise the effect of those changes on the 3D model.
It is important to understand that ClinCheck is not simply an automatically generated animation.
It is a clinical planning tool.
The specialist reviews the plan, modifies the movements and determines the position we want to achieve before approving the treatment.
This allows us to connect:
DSD → desired final aesthetic position → orthodontic movement → ClinCheck → minimal restorative treatment if it is still necessary.
This workflow is extremely important in conservative aesthetic dentistry.
And this ability to visualise the treatment is one of the reasons why, when Invisalign and braces are both clinically appropriate options, we particularly like working with Invisalign.
Not because braces cannot achieve excellent results, but because the digital workflow greatly facilitates planning and helps the patient understand the treatment visually.
Simulation is a direct route towards more conservative treatment
For us, this is probably the greatest advantage of the entire process.
Simulation is not simply marketing.
It is not only there so that the patient can say:
“My smile could look beautiful.”
It helps us make better decisions before carrying out any irreversible procedure.
When we have photography, scans, measurements and digital design, we can ask:
Do we really need veneers?
Can we achieve the result by moving the teeth first?
Can we use completely additive composite?
Do we need to treat ten teeth, or perhaps only four?
Could whitening solve part of the problem?
Do we need to modify the gums?
Is there enough space for the restoration?
Could excessive volume become a problem?
Is there any limitation that we need to address first?
Designing and simulating before intervening is one of the most direct ways of avoiding overtreatment.
Measuring before we start also reduces unexpected problems
A digital workflow allows us to collect a large amount of information before treatment begins.
We can measure the available space.
Compare designs.
Analyse volumes.
Visualise positions.
Plan movements.
Transfer information to the laboratory.
Review the design before transferring it into the mouth.
This does not completely eliminate human error or turn dentistry into a mathematically perfect science: we are still working with biological tissues, and every patient responds individually.
But it can significantly reduce uncertainty and certain planning and communication errors.
This is why our treatments are not simply based on trying to achieve something during the appointment.
We reach the clinical stage with a much clearer understanding of:
what we want to achieve
what changes we need
which structures we need to preserve
and what the limitations of the case are.
In our experience, this preparation is one of the reasons why the final results usually correspond very closely with the objective we defined together with the patient, and sometimes the real-life integration can look even more natural than the initial simulation.
Less time explaining, more time understanding
Digital simulation also improves communication enormously.
A complex treatment can be difficult to explain using words alone.
We may tell a patient that we want to:
Move two incisors
Modify the midline
Slightly lengthen four teeth
Change the gingival architecture
Whiten first
Add composite afterwards
But until the patient actually sees it, it can still be difficult to understand why each stage is necessary.
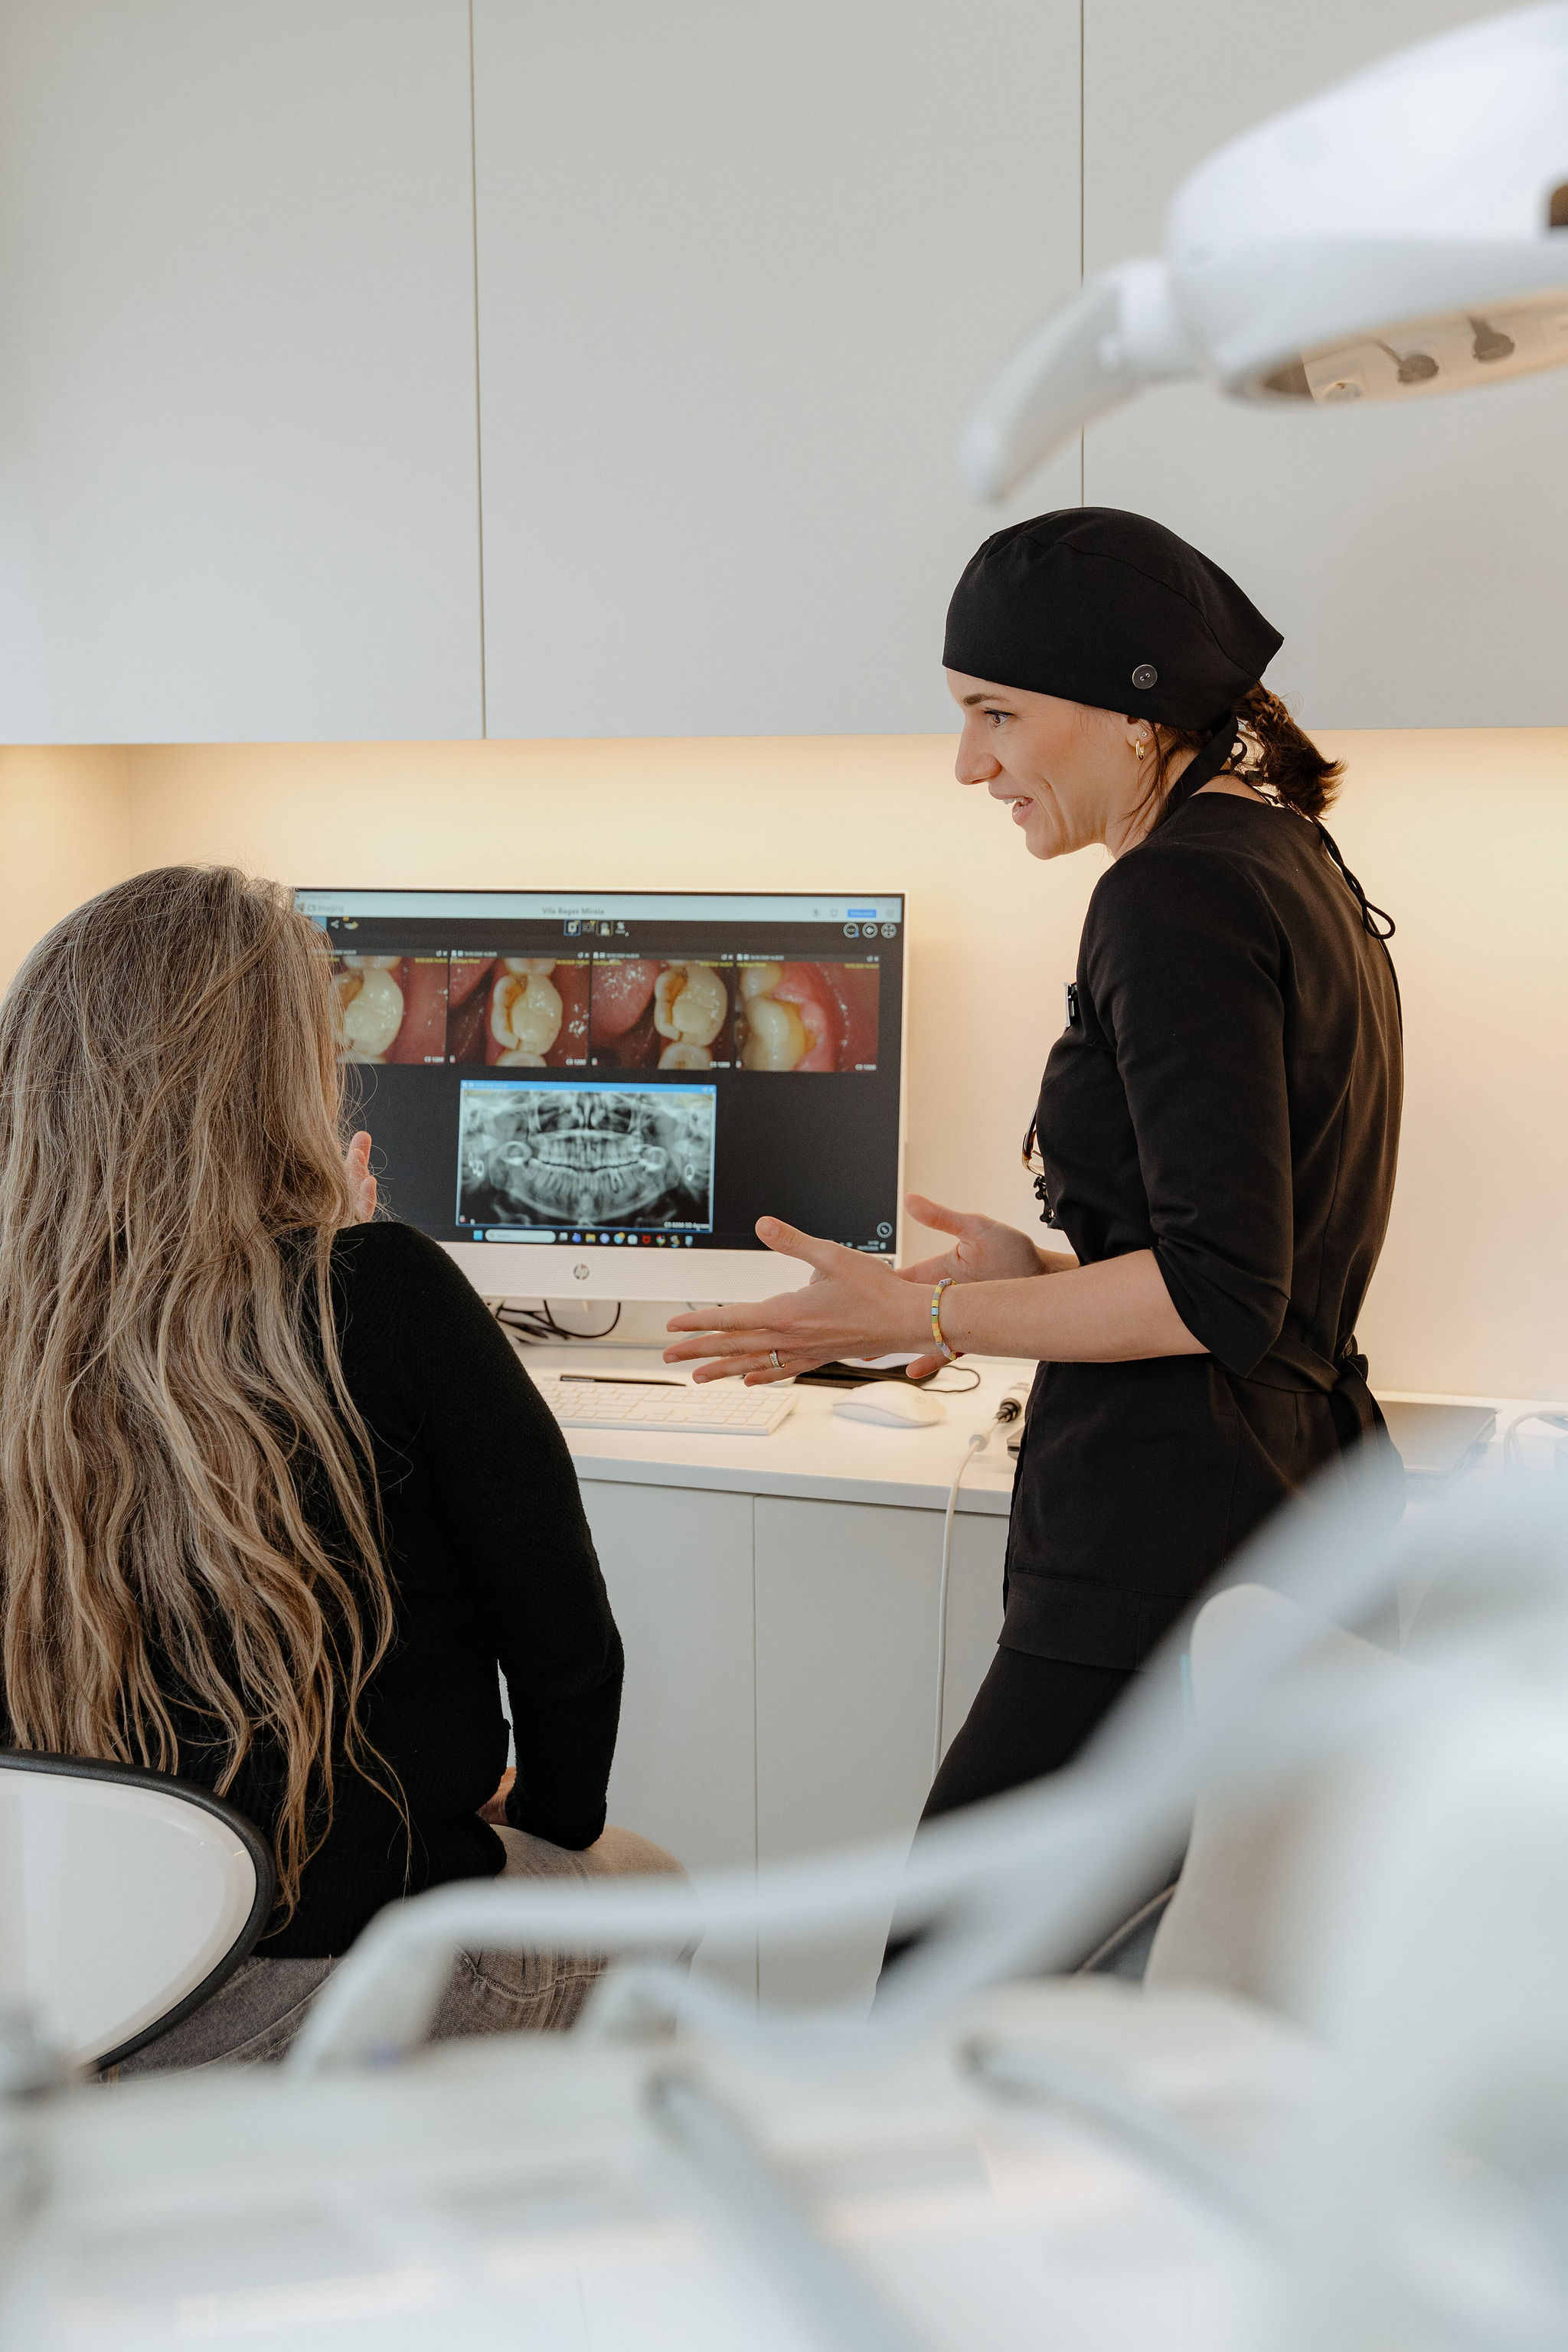
When we show the design, scan or ClinCheck, the patient can understand much more quickly:
Where we are now
What problem we want to solve
What changes we propose
Why each treatment is necessary
And what the final objective is
This can simplify planning, reduce repeated explanations and, in certain treatments, avoid appointments or modifications that might otherwise become necessary later.
Technology does not replace our explanation.
It makes that explanation much easier to understand.
The patient participates in their own design
For us, this is fundamental.
The patient should not discover their definitive smile at a point when it can no longer be easily changed.
We want them to participate beforehand.
During the design process, we can discuss:
Shape
Length
Proportions
Character
Natural appearance
Colour
Amount of change
What they want to improve
What they want to preserve
Even something that sounds as simple as “I want natural-looking teeth” can mean very different things to different people.
That is why we need to show.
Compare.
Ask.
Modify.
And, whenever possible, test.
The patient is not simply the person receiving the treatment. They are part of the decision-making process.
Is the simulation exactly the same as the final result?
No.
And it is important to say this clearly.
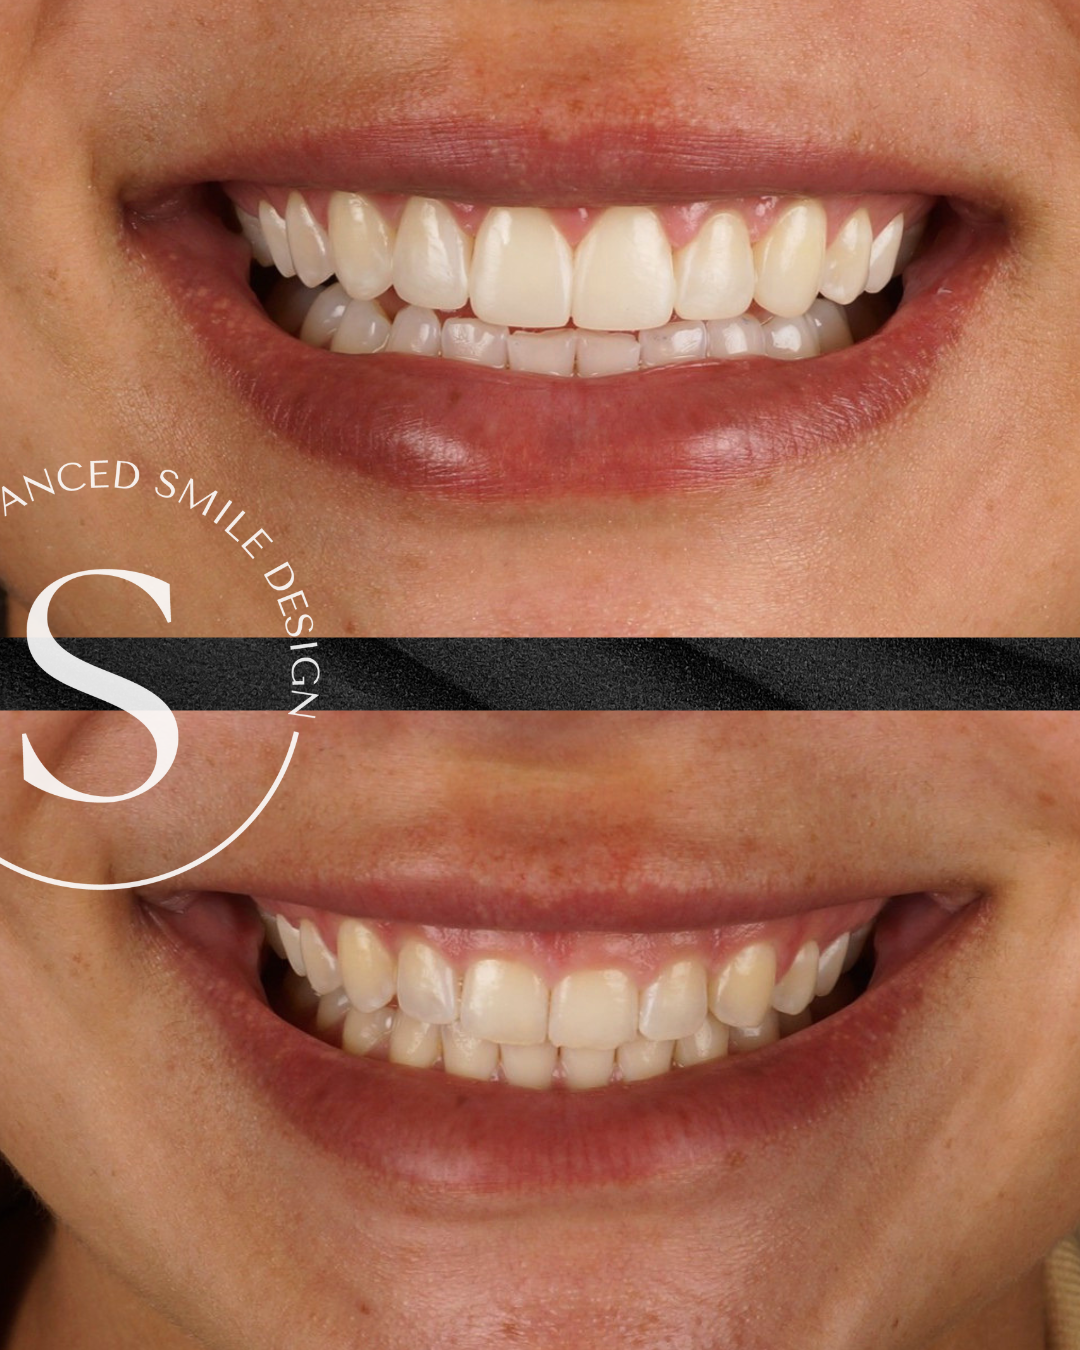
A digital simulation is a planning tool.
It is not a mathematical guarantee.
The definitive result can be influenced by:
Real anatomy
Biological tooth movement
Gingival response
Healing
Restorative material
The bite
Colour
Function
The individual limitations of each patient
This is why we use different levels of simulation.
A photograph provides information.
The scan adds three-dimensional information.
The mock-up allows us to test the design.
And the clinical examination determines what is genuinely possible.
The more information we combine, the greater our ability to make a well-informed decision.
Technology does not design your smile for us
SmileCloud, 3Shape, exocad, DSD and ClinCheck are extraordinary tools.
But none of them should replace clinical judgement.
Software can calculate.
It can measure.
It can generate a proposal.
It can show different possibilities.
But deciding which smile suits a particular person, which tissues we should preserve and which treatment is genuinely indicated still depends on the diagnosis and the experience of the clinical team.
Technology does not replace the professional.
It allows us to work with more information and make more precise decisions.
Our philosophy at SMITA: design first, intervene afterwards
At SMITA, we try to postpone irreversible decisions for as long as possible.
First, we analyse.
Then we design.
Then we simulate.
Then we measure.
When possible, we test the design with a mock-up.
If we need to move teeth, we plan the orthodontic treatment.
We adjust the design together with the patient.
And only then do we move on to definitive treatment.
Because the clearer we are about where we want to go, the less we need to improvise along the way.
And, above all, before we begin we can ask:
What is the most conservative way to achieve this result?
For us, that is the true importance of Digital Smile Design.
Not using more technology to perform more treatment.
But using technology to plan better, avoid unnecessary treatment, preserve more healthy tissue and achieve more personalised and predictable results.
Designing first allows us to intervene less and preserve more.
Frequently Asked Questions
Can I see what my smile will look like before getting veneers?
Yes. We can use photographic simulations, 3D design and, in certain treatments, transfer the design into the mouth using a mock-up before carrying out the definitive restorations.
What is the difference between a digital simulation and a mock-up?
A digital simulation allows us to visualise the possible result on a photograph or a three-dimensional model. A mock-up physically transfers the design into the mouth so that we can evaluate volume, length, the smile and the relationship with the lips.
Can I modify the mock-up if I do not like it?
Yes. That is precisely one of its purposes. It allows us to review the design and modify shape, length or volume before moving on to definitive treatment.
What is Digital Smile Design?
It is a planning methodology that studies the smile in relation to the face, lips, teeth and gums in order to first define the aesthetic objective and then determine how to achieve it.
What is Invisalign ClinCheck?
ClinCheck Pro is Invisalign’s planning software, which allows the clinician to digitally visualise and modify the planned movement of the teeth before and during treatment planning.
What is the relationship between DSD and Invisalign?
After designing the ideal smile, we may discover that some teeth need to be moved before carrying out any restorative treatment. In these cases, we use orthodontic planning to move the teeth towards the position defined by the aesthetic design and subsequently reduce the amount of restorative intervention required.
Does digital simulation guarantee the exact final result?
No. It is a planning and communication tool. Biology, tissues, tooth movement and other variables can influence the final result.
Can simulation help me avoid veneers?
Yes. In some patients, the design shows that the problem can be solved or reduced through orthodontics, whitening, gingival treatment or small additive restorations, avoiding more extensive restorative treatment.
Book your appointment at SMITA: